Being the collector of things that I am, I have amassed quite a handful of random small objects, interesting pieces of rusted metal, shells and of course stones. This habit of obtaining a small token from a memory is so ingrained into my thought process I don’t even think twice about it nor do any of my fellow friends when they realize they’re talking to themselves and I am on the ground in the middle of street picking something up. Great story to show my devotion to the habit, on one drunken Saturday night of which I do not fully remember after a certain point I nearly tumbled over picking some random dirty object off bar/nightclub filled street. About three days later, I happened to be roaming through my purse when I came across a rather simple leather cord bracelet with a silver tree of life type pendant only to then here laughter from my friend Pedro over my puzzled look. Apparently upon being told to put down the bracelet that night by not only my husband but Pedro and another friend, I drunkenly replied no and that I will be inspecting later to see its worth or something along those lines. Bottom line is I take my collecting seriously, even in bouts of lost consciousness.
Getting back to stones, I’ve collected so many over the years and most wind up in various jewelry pieces or DIY projects. However I’ve found that I don’t always want to glue the stones on a surface and sometimes I want something a bit more softer than wire. Enter macrame and my new favorite process for repurposing my random collection.
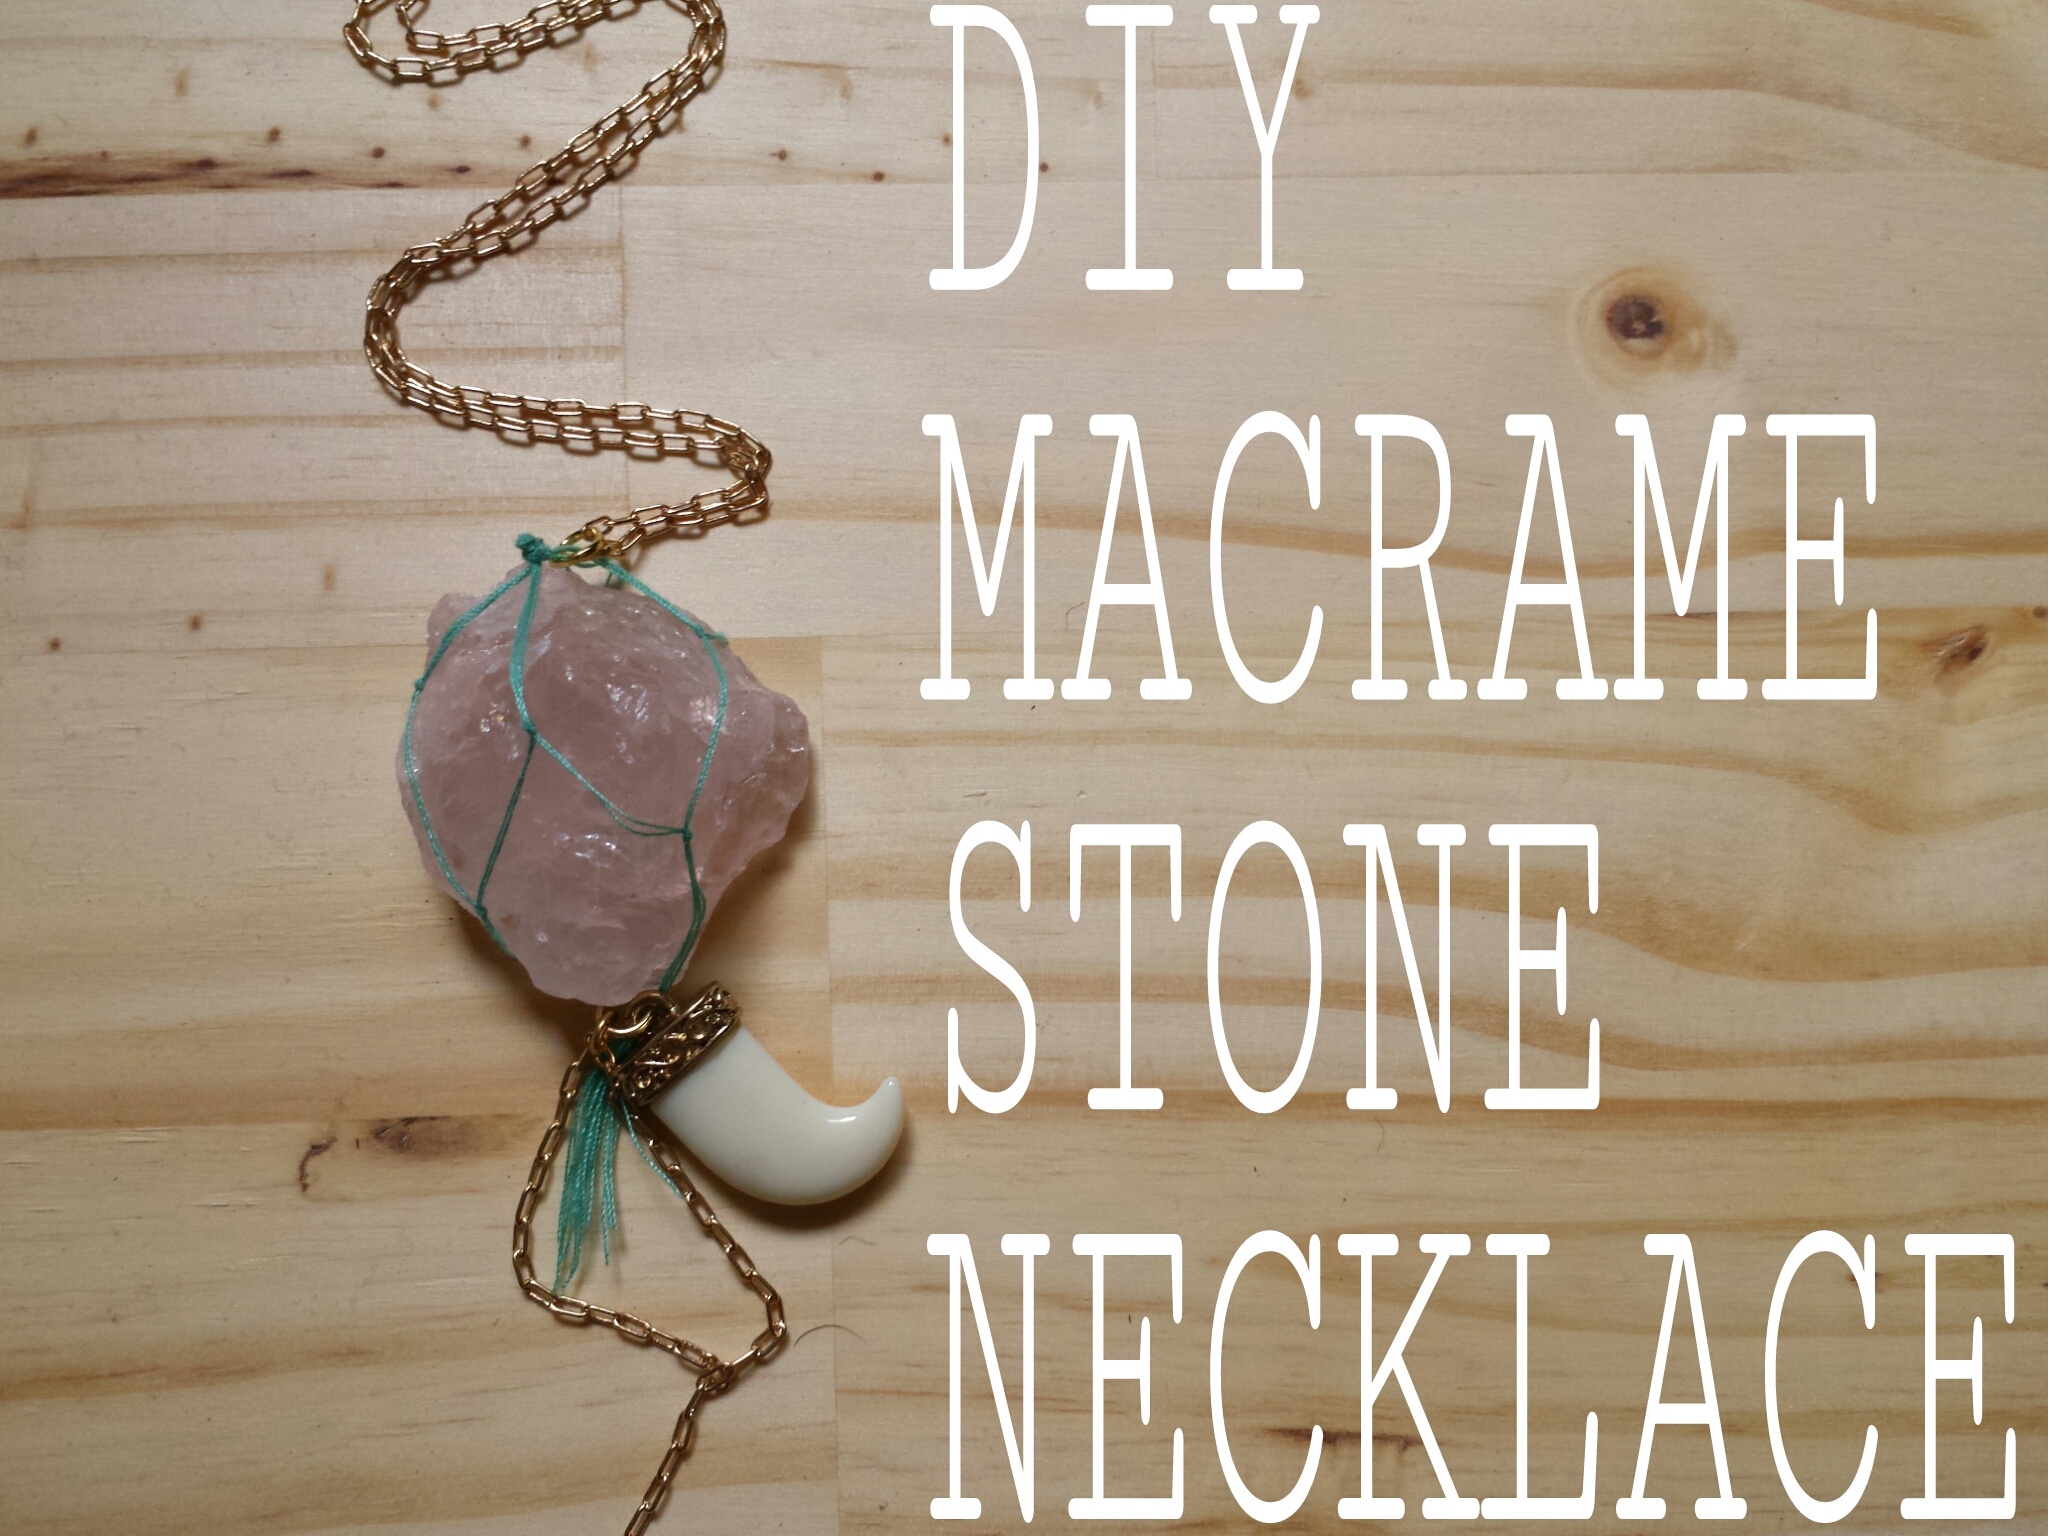
The process is fairly simple and the only reason mine was slightly challenging was with the rose quartz nugget I chose to use sewing thread over leather or embroidery thread for a more delicate finished look.
BUY THIS
- String ( leather cording, hemp, embroidery thread or thin cotton rope will work)
- Scissors
- Handpicked Stone or Shell
- Chain or Cording for necklace base
- Charms (optional)
- Fabric/Hobby Glue (optional)
NOW DO THIS
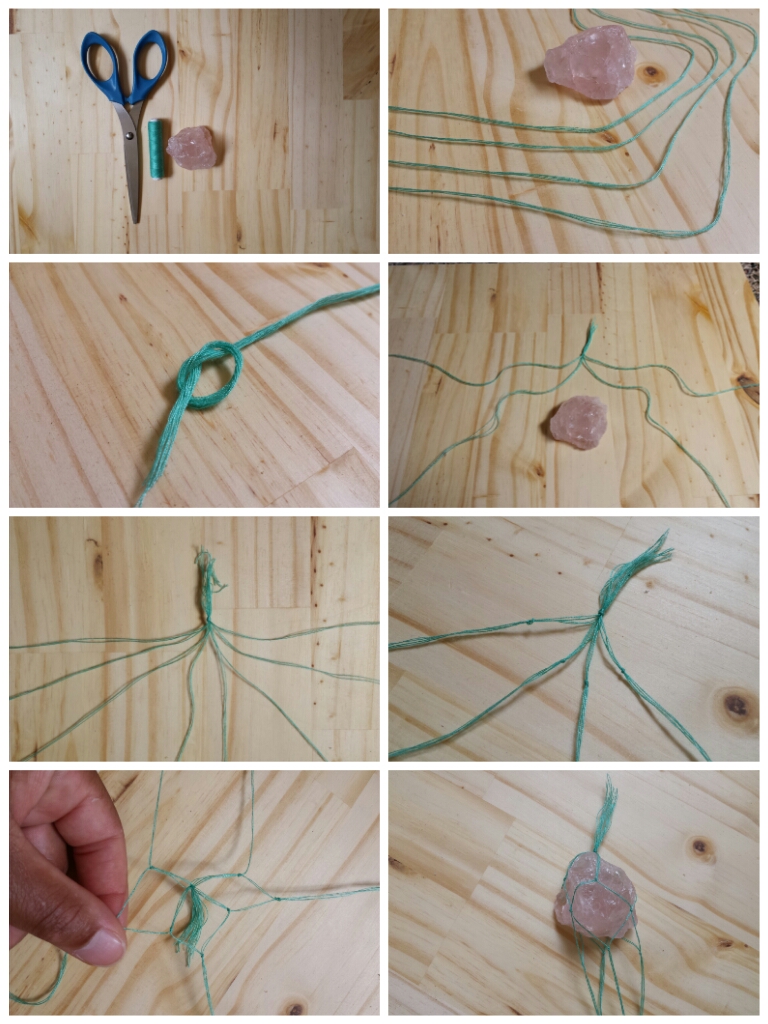
The foundation to this DIY is a series of overhand knots and once you make one or two the process will seem more natural.
- Take 16 strands of your chosen string each about 15-20 inches and make an overhand knot leaving a slight tail that will become your tassel bottom. There will be excess once the whole series of knotting is complete but I’d rather have more than less when it comes to the final knot.
- Separate you string into 4 groups each with 4 strands (Group 1, Group 2, Group 3, Group 4)
- Find a starting group (Group 1) of string, separate 2 strands from that group and using 2 strands from next string group (Group 2) make one over hand knot.
- Using the 2 remaining strands from Group 2 and take 2 strands from Group 3 make another over hand knot
- Using the 2 remaining strands from Group 3 and take 2 strands from Group 4 make another over hand knot
- Using the 2 remaining strands from Group 4 and take the remaining 2 strands from Group 1 and make another overhand knot.
- You have now completed one row of your net which should look something like the 7th picture in the collage above.
- Following steps 3-6, you will continue to make rows based on the size of the stone you want to encase. As you can see in the last picture of the collage above I did 3 rows for my rose quartz nugget. After each row it would be best to slip your stone in to gauge how many more rows you will need and it gives you the opportunity to position the rock in the most flattering way without making to many or two little knots and having to start over. In the case of my extremely thin thread, once knotted it can’t easily be undone so I played around after quite a bit after the first two rows.
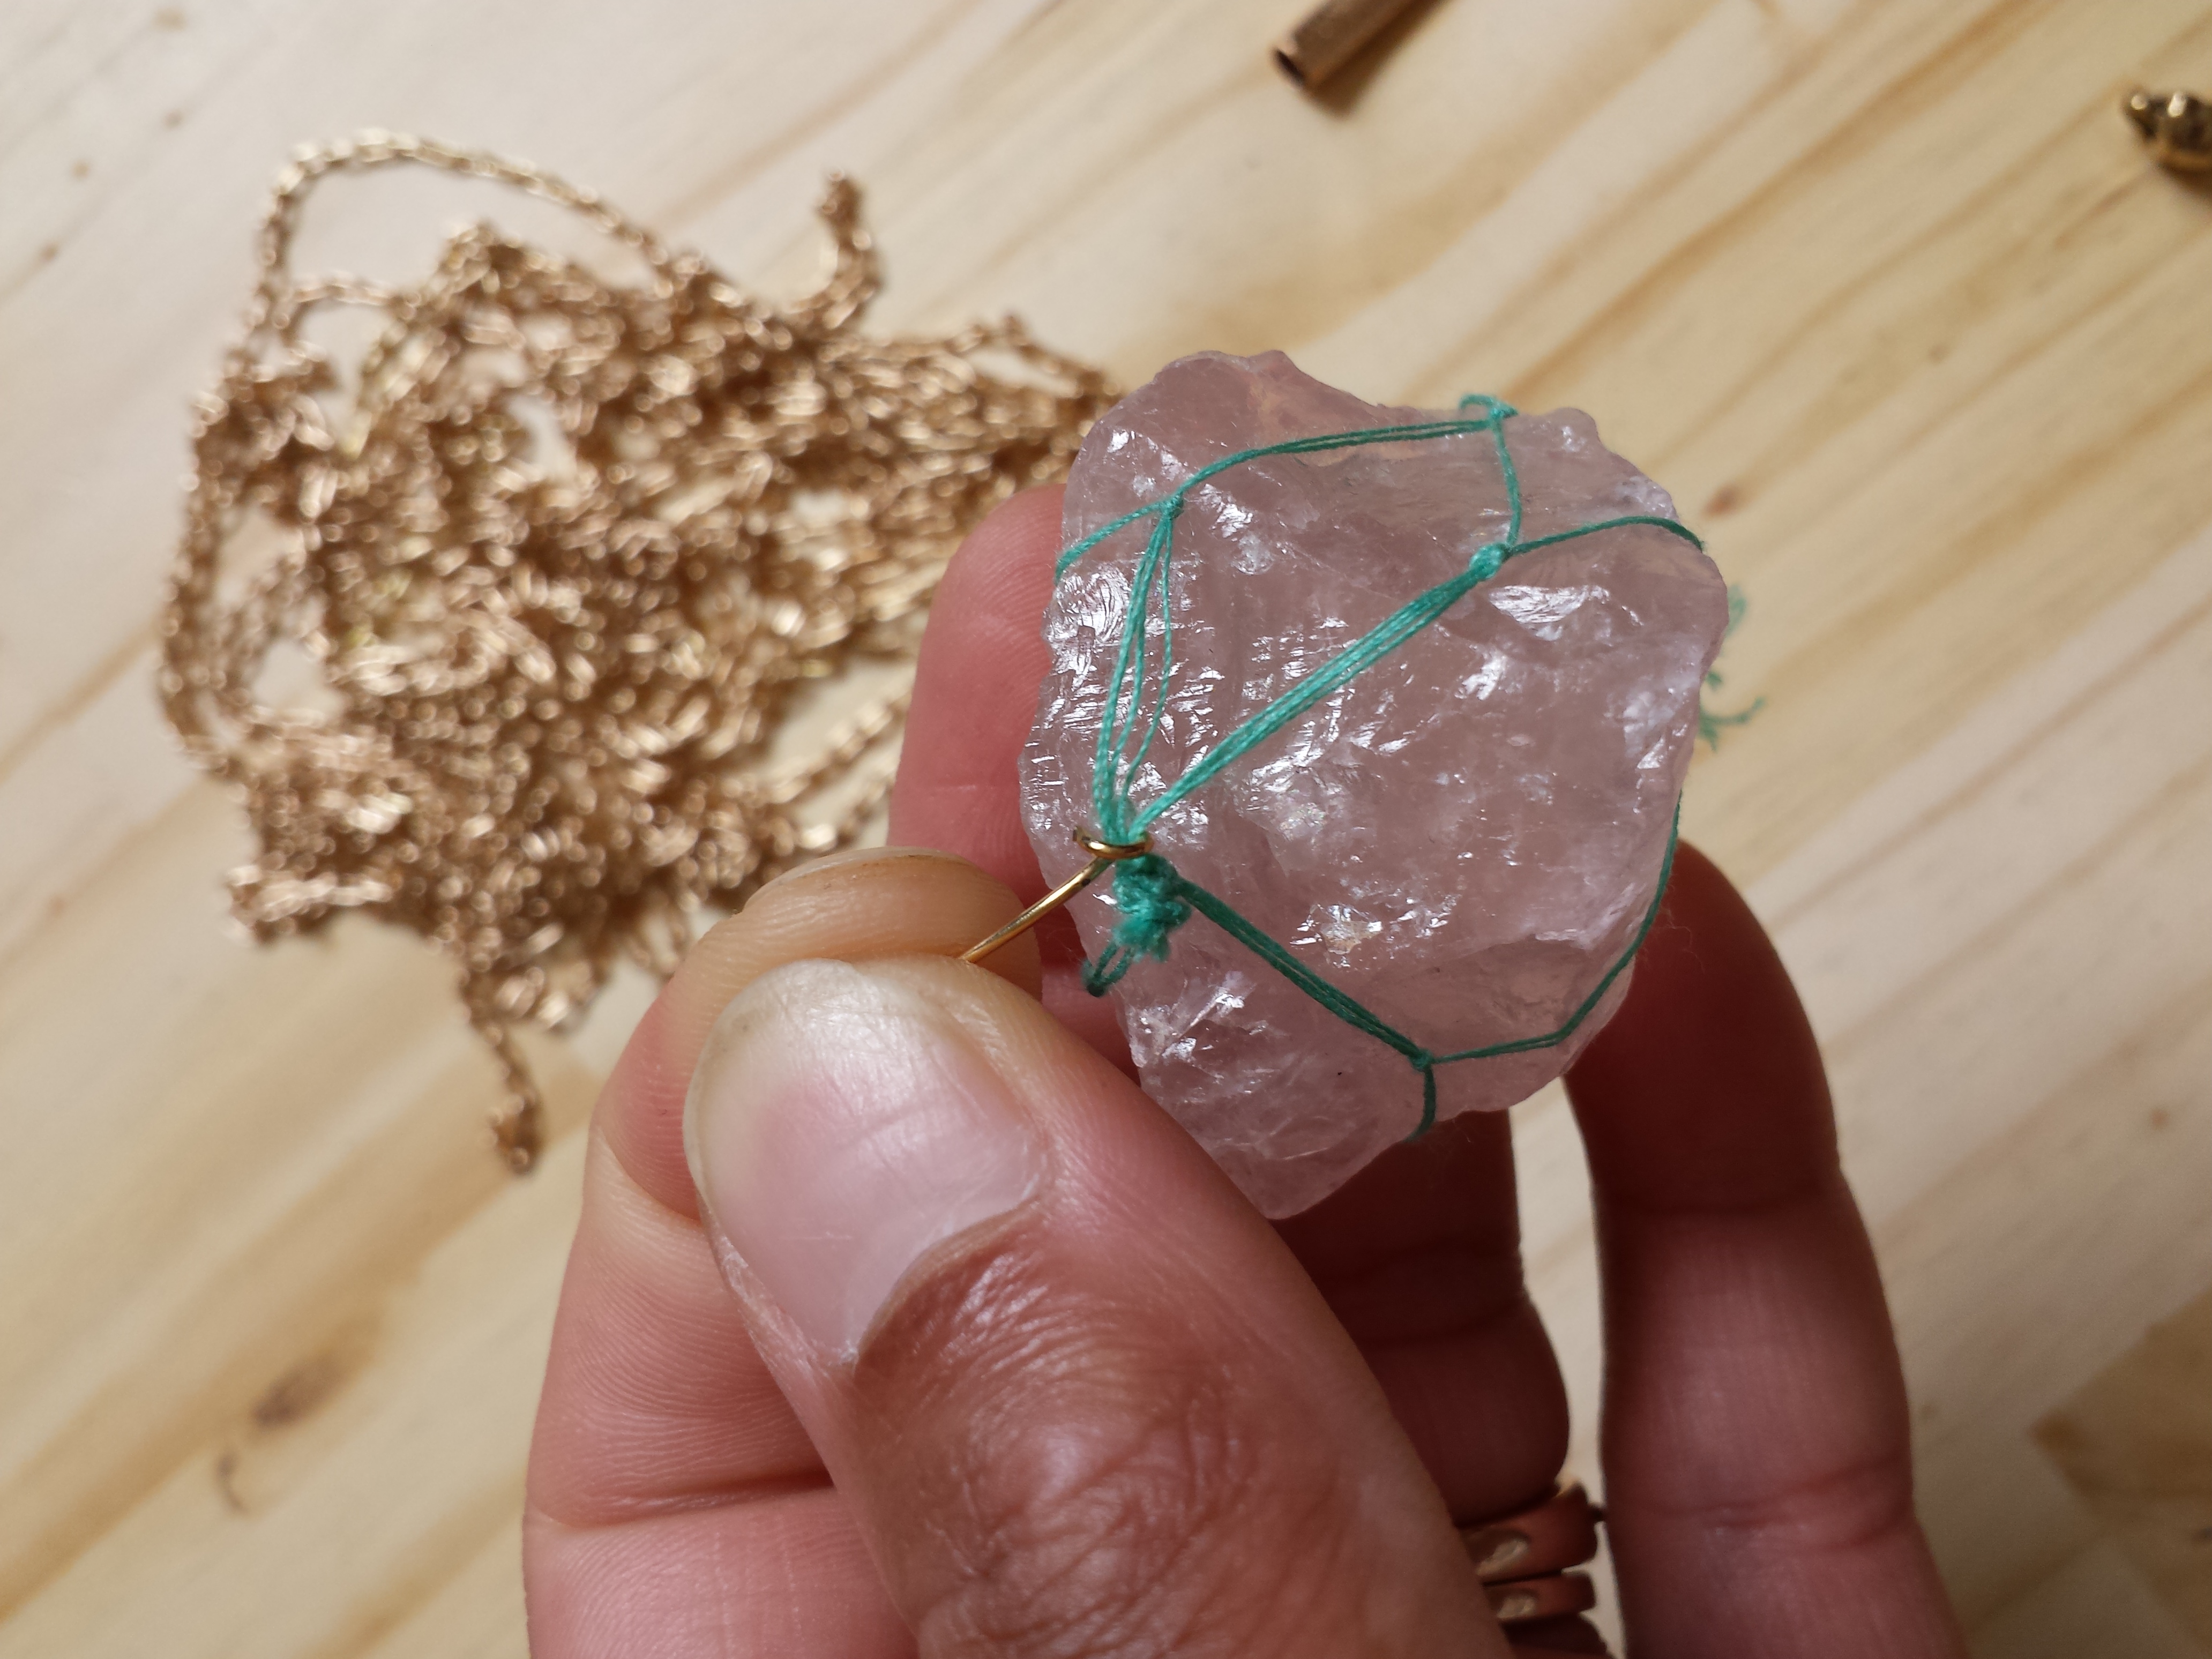
- Once you have properly encased your stone, make your last overhand knot using all the strand groups making sure you get at close to the stone as possible and making the knot as tight as possible. Especially if you are using leather cording or silky thread, the knot will be more likely to loosen over time so you may want to add a small dollop of glue to secure it.
- Now with the excess string you can either cut it pretty close to the knot itself and then attach you necklace base or you can use the excess string as part of your necklace base by braiding it, weaving through the chain or you could trim it only a bit and leave the fray as part of your design.
And that’s pretty much it, everything else is up to your imagination
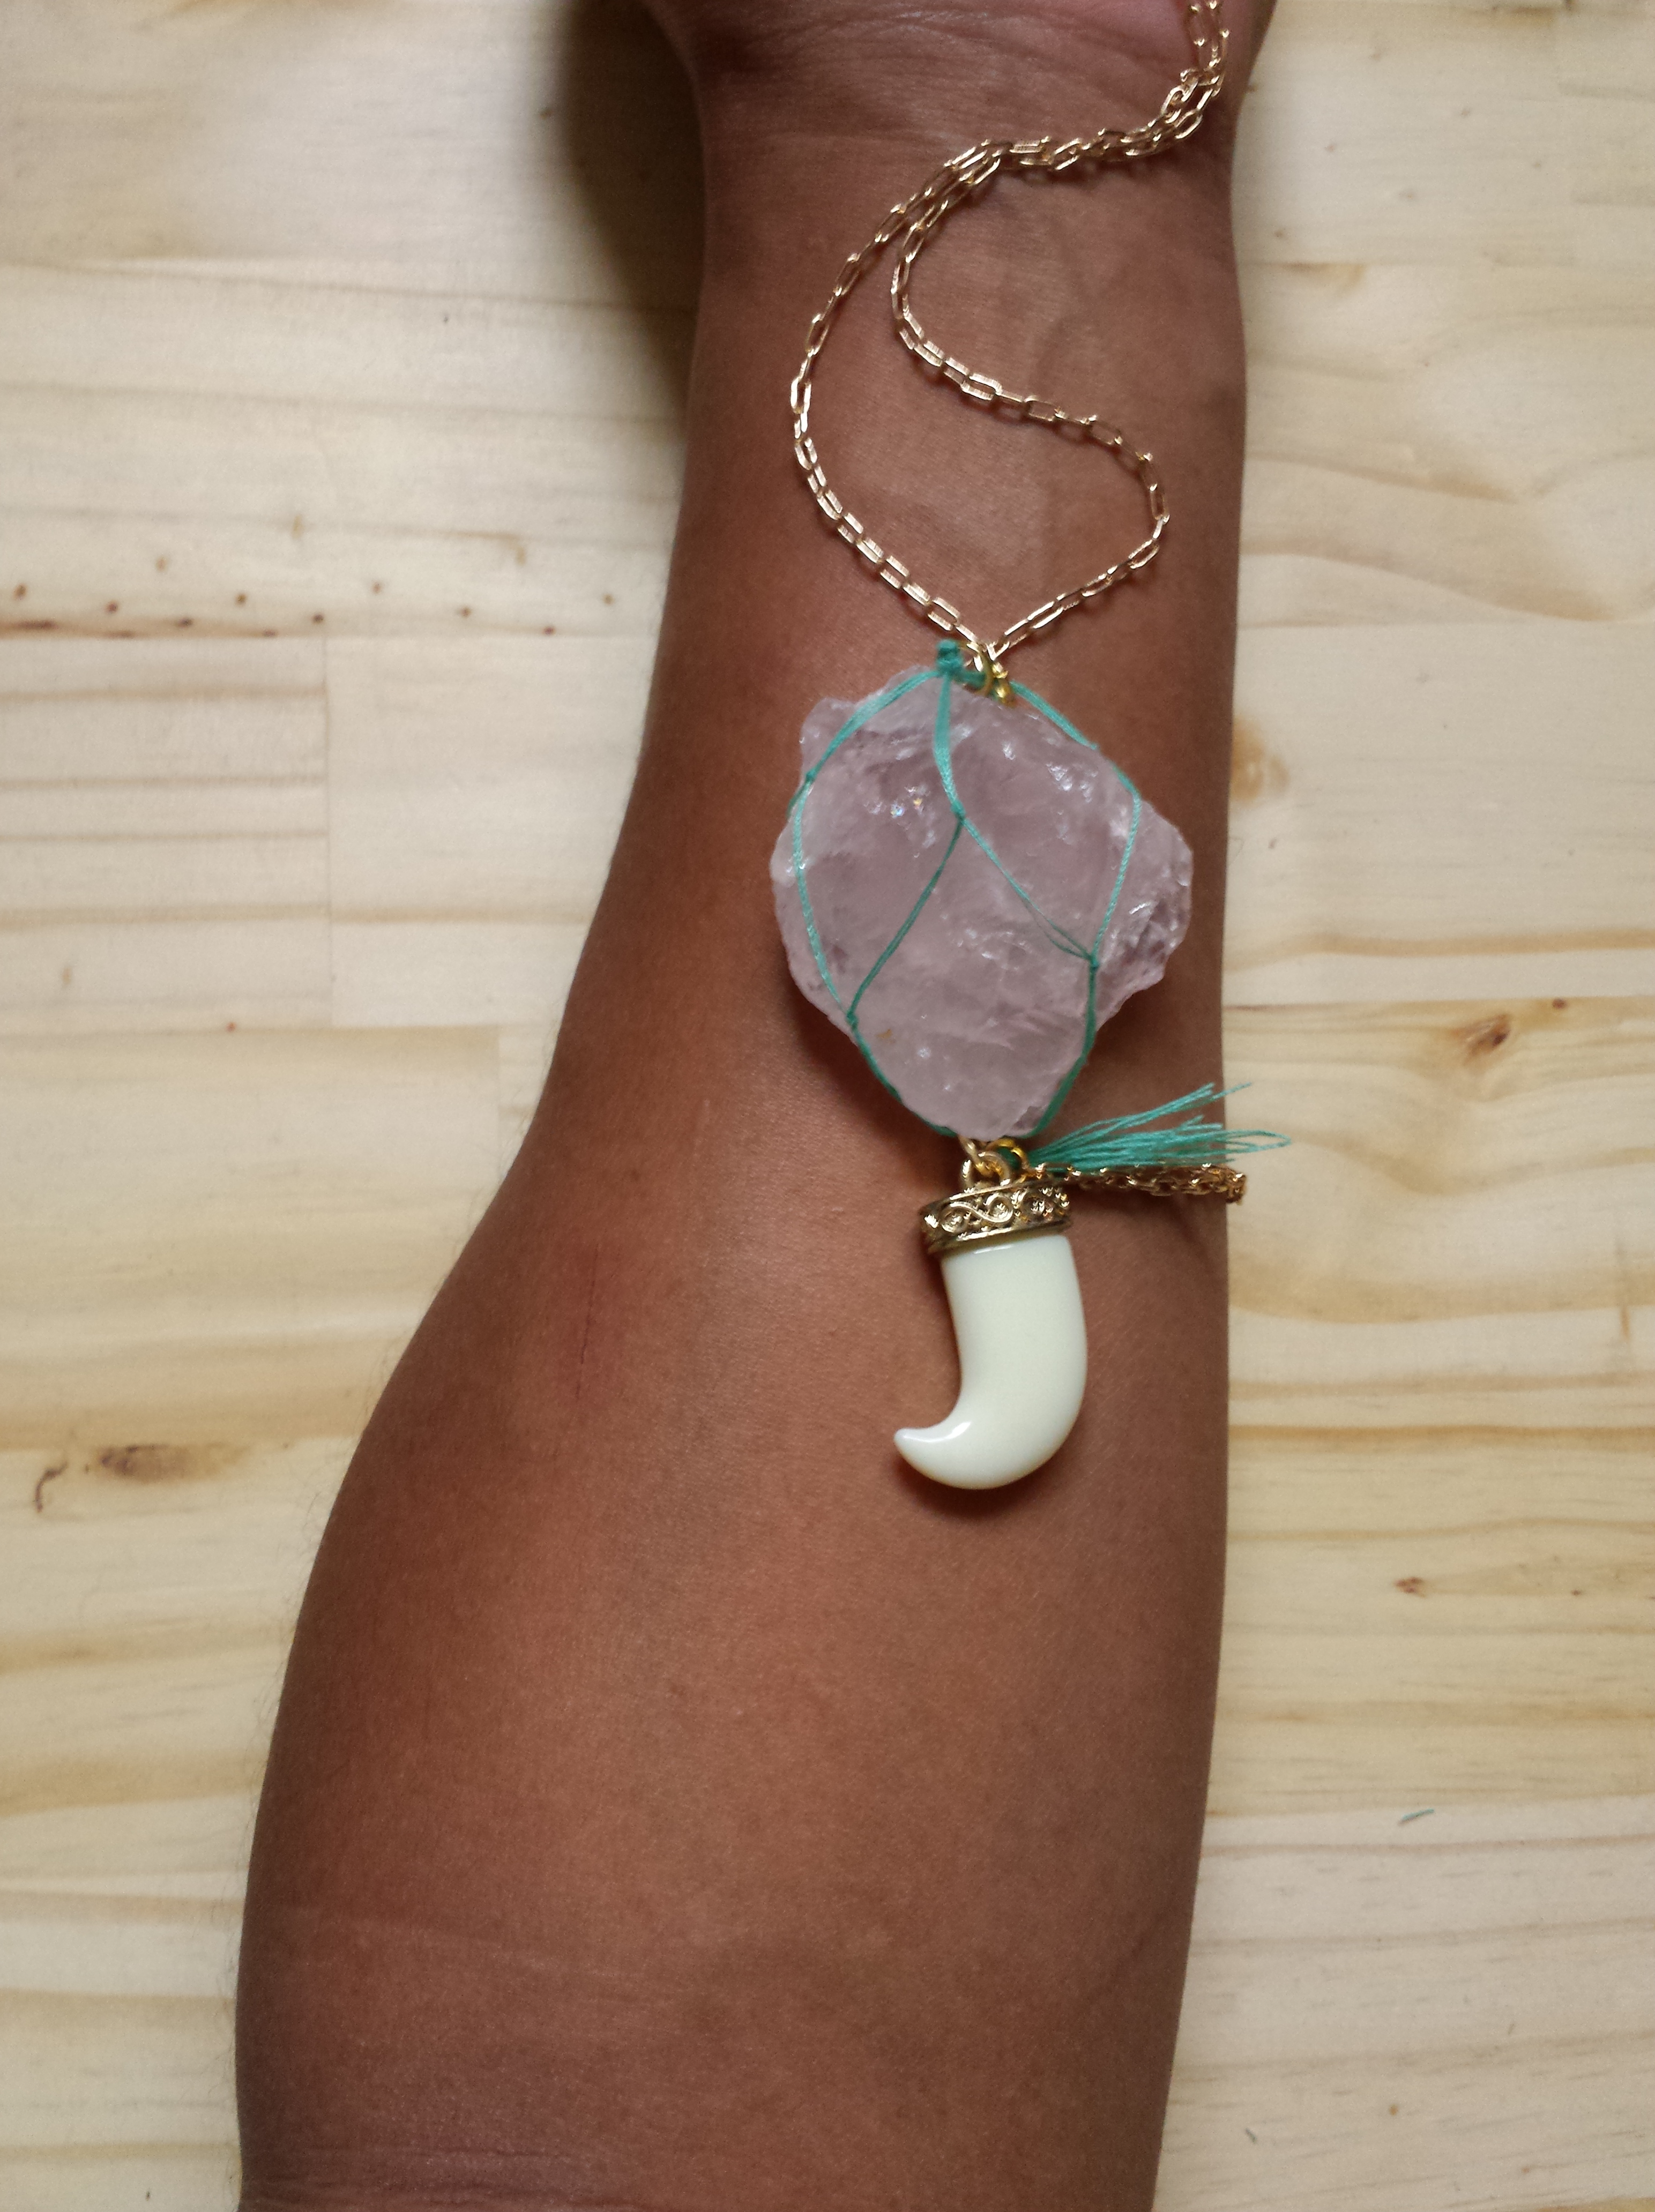
With the rose quartz version I added the charms and chain directly onto the macrame net.
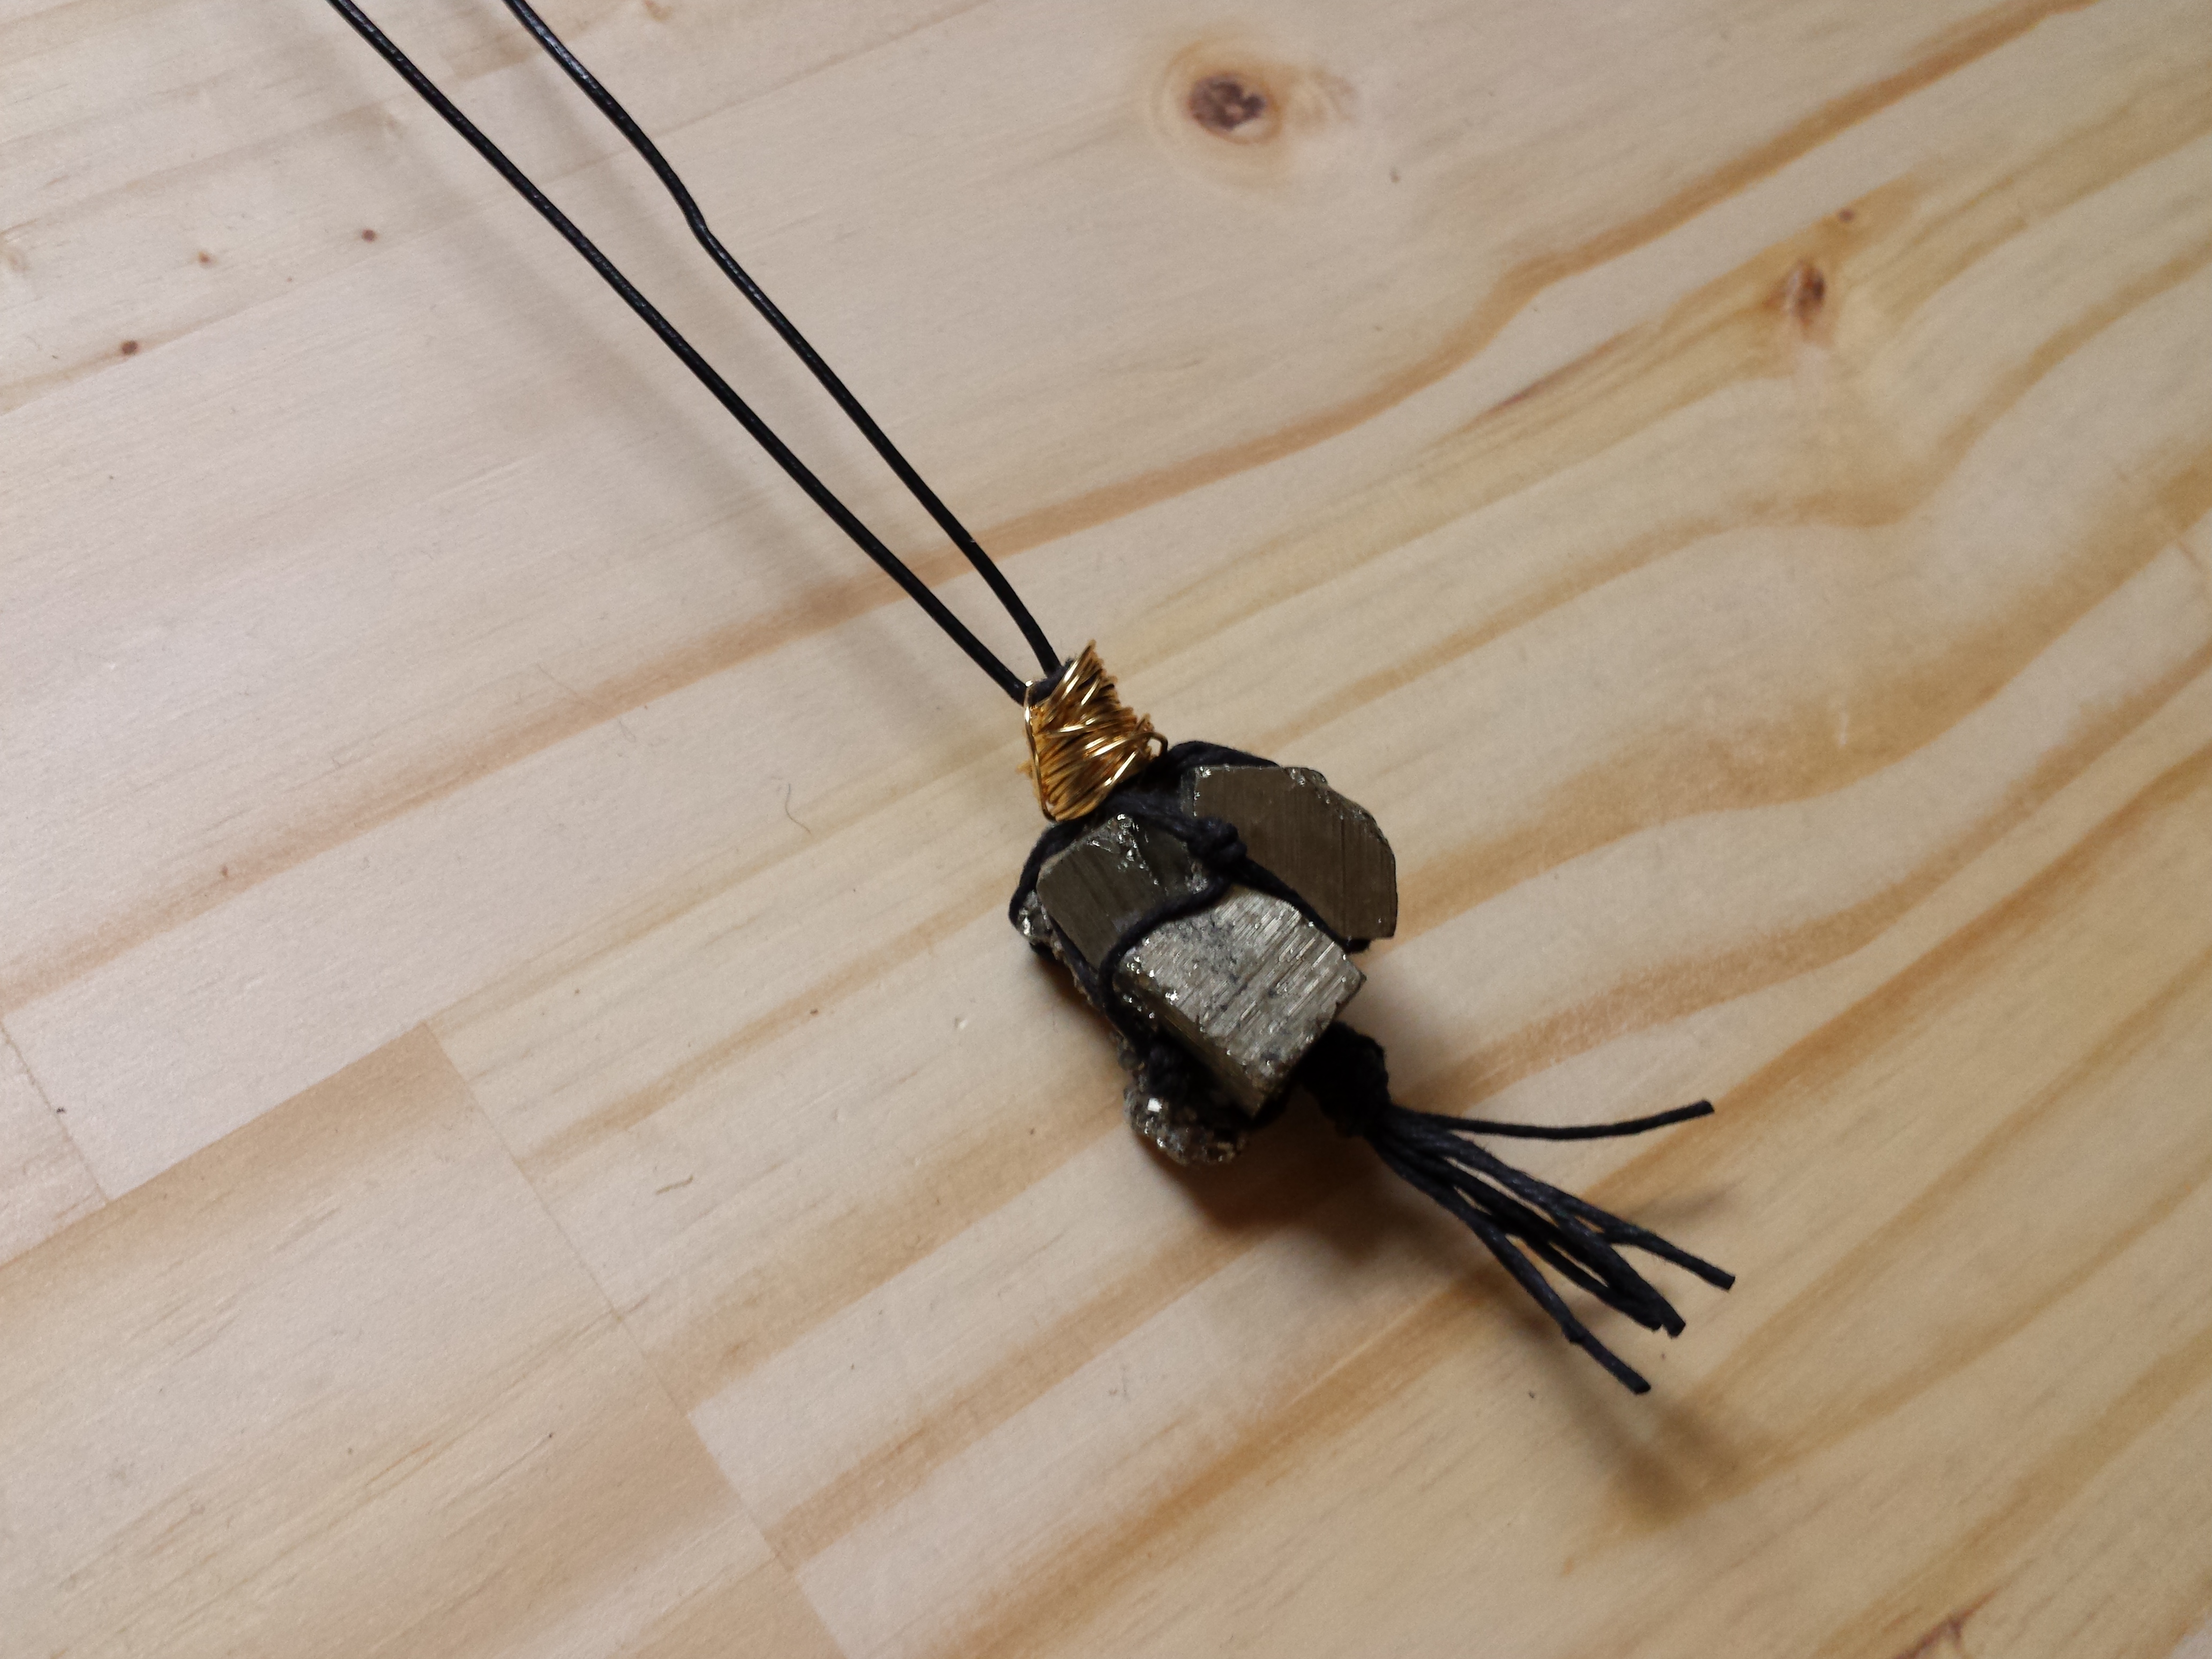
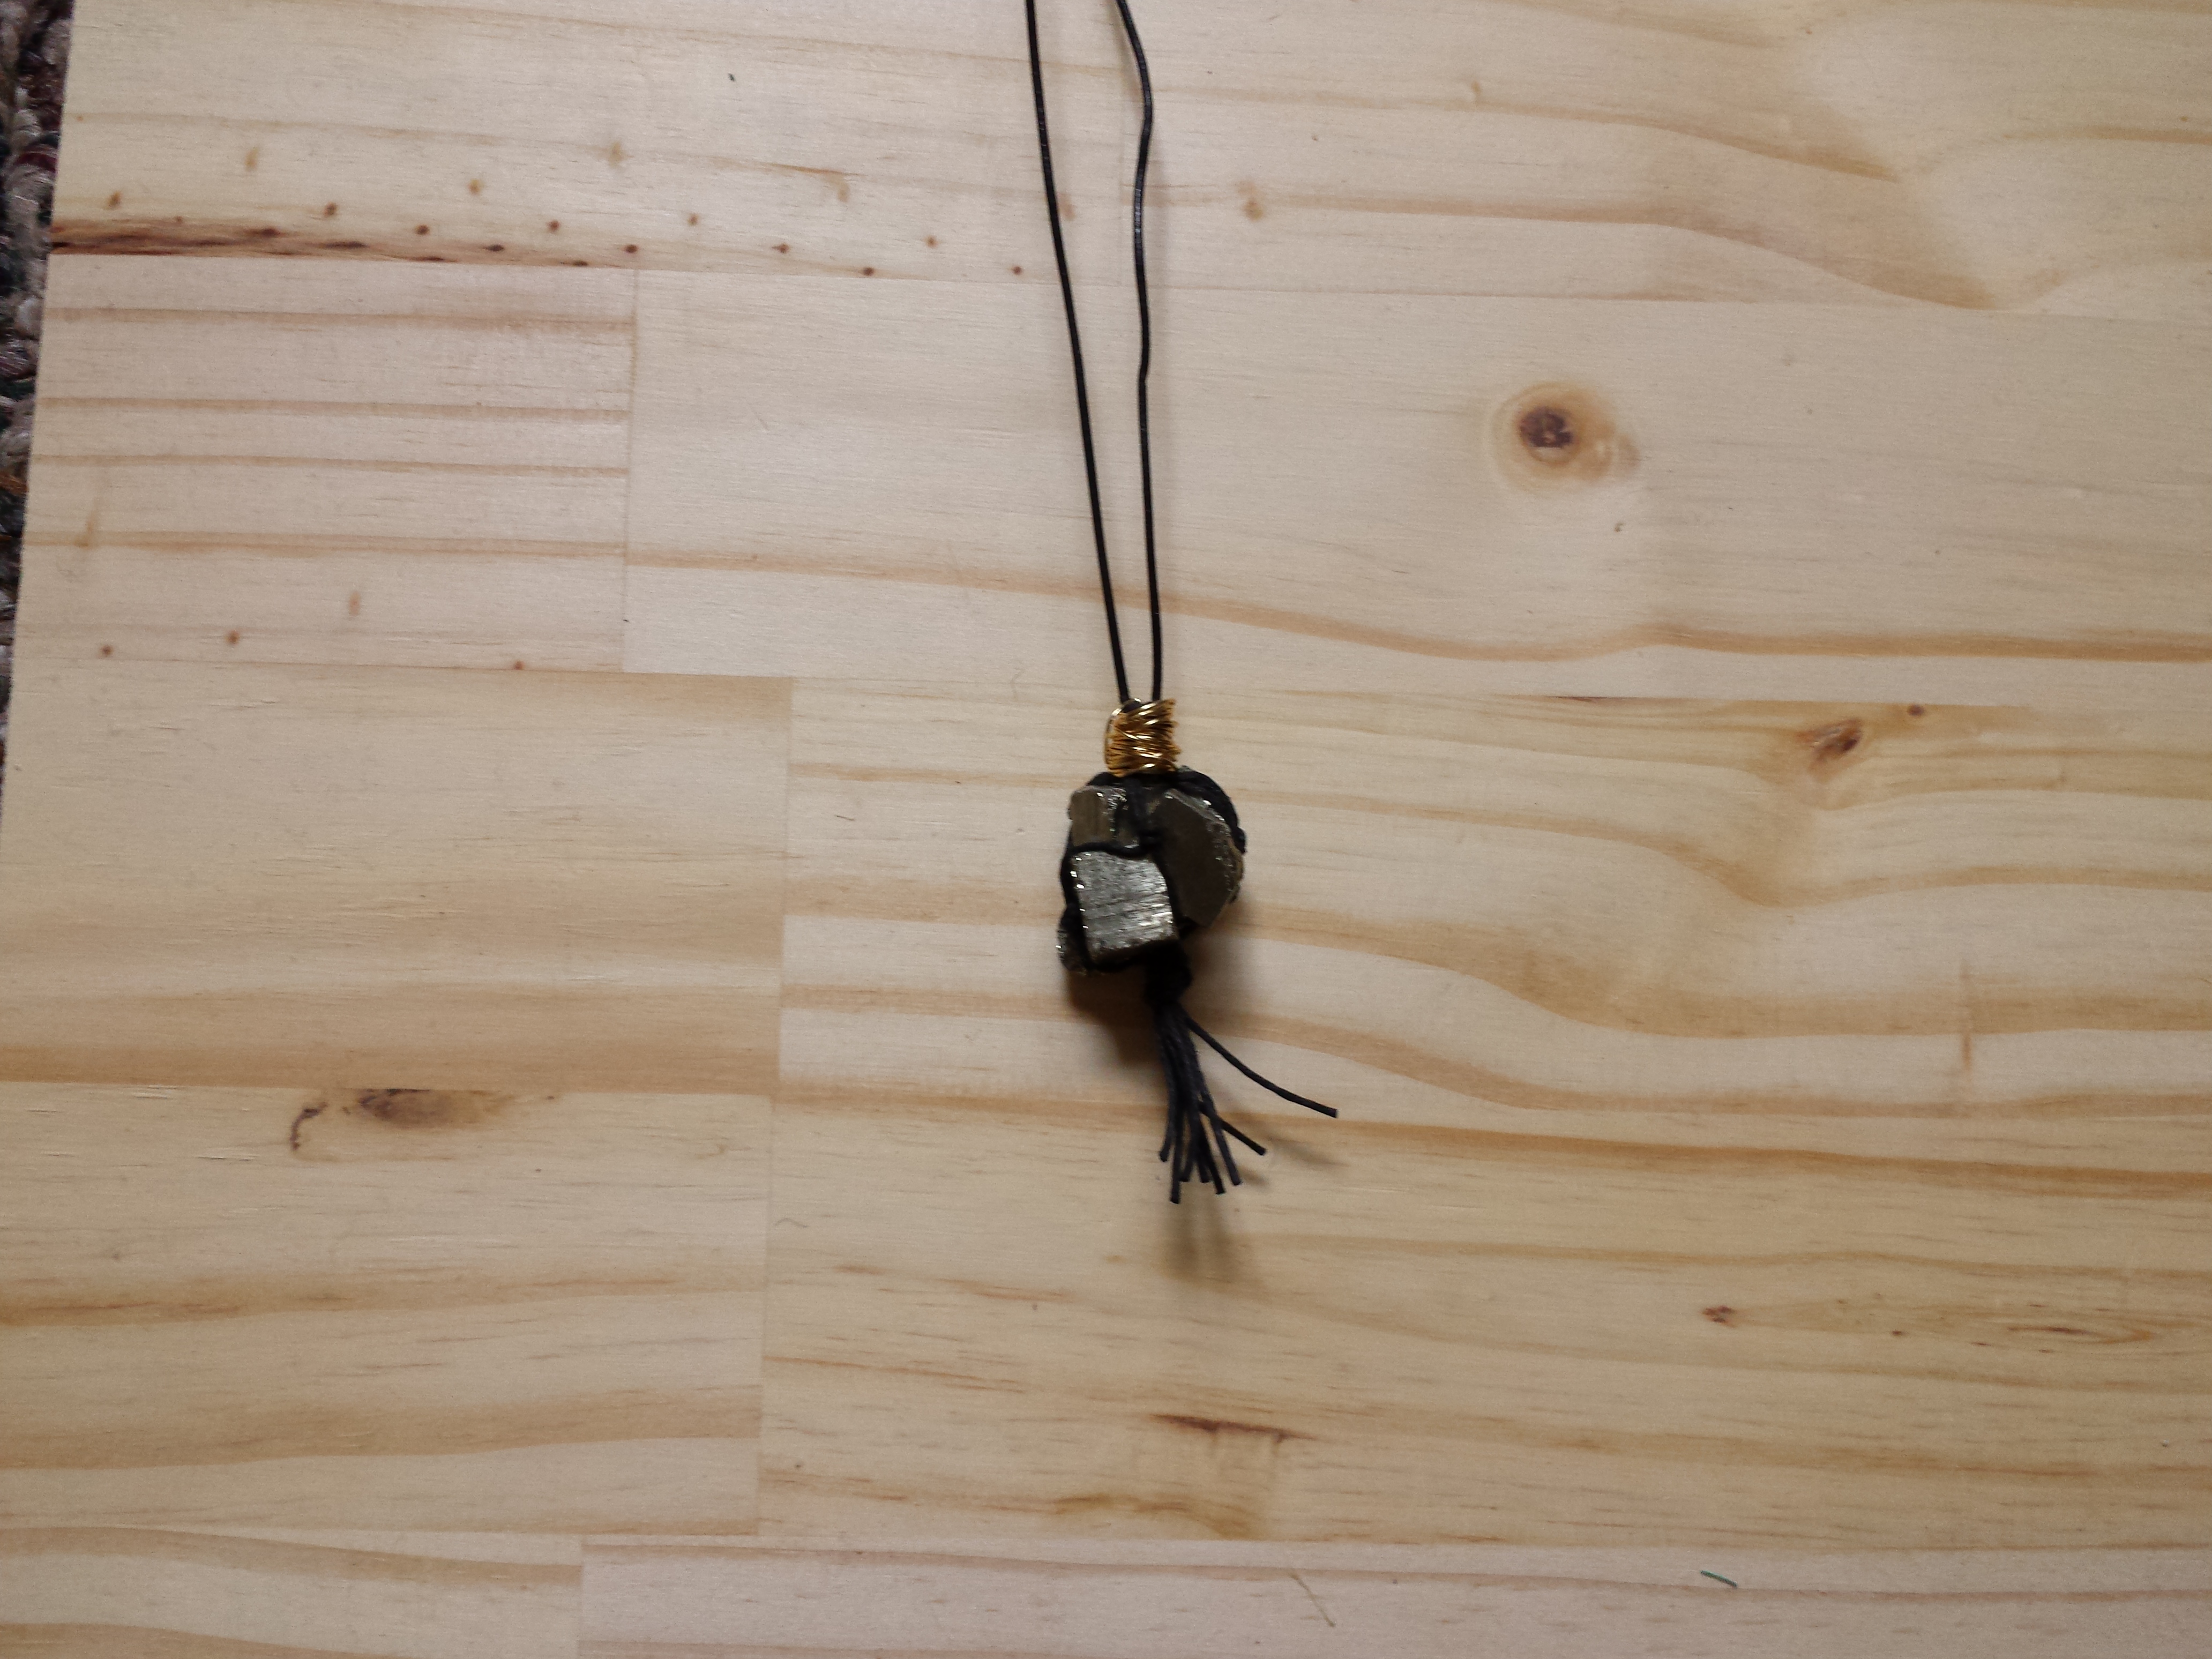
And because this creation was so easy to do it only made sense that I would make another. Enter in my tribal pyrite version. In order to attach the necklace base to this version I strung my leather cording under my final overhand knot then used delicate gold wire to mask the ugliness of it. This one is as clean as the rose quartz one and my knot wasn’t the best but the imperfections in craft projects are always to be embraced…at least that’s how I see it.
So, if you’re a collector of random tidbits like me enjoying having another excuse why you don’t need to get rid of them. The best part is this can be used for anything really, including your shells and sea glass.

I love to randomly collect stones and pieces of wood and shells and the like as memories. I have to admit that I just loves pebbles and stones, all the colours and shapes they come in. I display them in my window though most people think I’m a little odd for that. I’ve been thinking of making the smaller ones into jewelry, I love wire but this macrame is a nice addition to it! Thank you for this idea!
LikeLike
I’m so glad you liked the DIY Laurien. Because of the vast differences between stones it’s so easy to get addicted and yes I too love the wire wrapping but this has a softer touch. Now you can hang the wrapped stones in your window and I bet everyone will start asking you to make them.
LikeLike
That’s another awesome idea, hanging stones in my window! I think apart from my neighbours, my cat will love it. Thanks, I’m just so excited to get started!
LikeLike